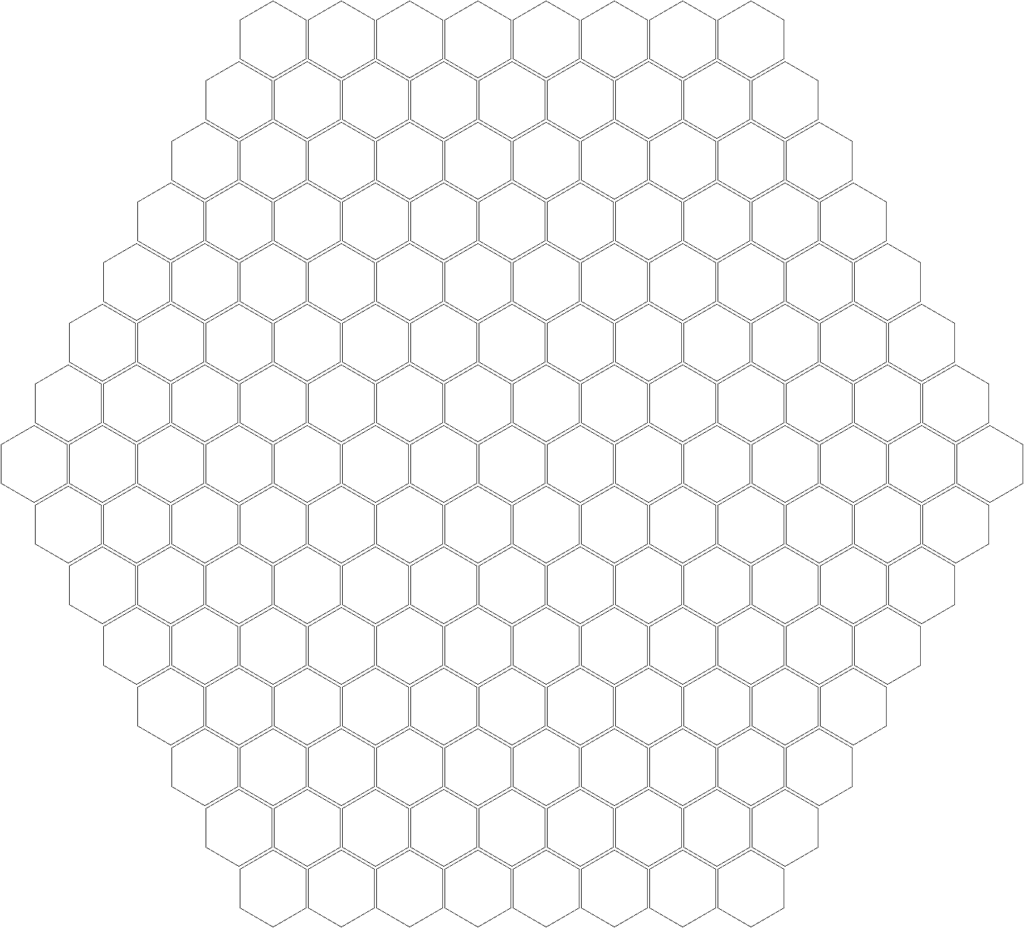
In this article we will inspect the algorithm which generates a picture of hexagon shape field, consists of template little hexagons, which we get from template PNG image file in this example (one can extend the code to auto-generate that template with setting image size and — in case of non-regular hexagon — internal angle: this doesn’t refer to algorithm of field image generation itself).
First, we set a grid size, counting as horizontal length but one block because we want to divide it by 2 further, so it must be even number:
FIELD_SIZE = 14Then, we will need some settings about template image:
TEMPLATE = "./hexagon.png"
THIRD_HEIGHT = 24
Meaning of THIRD_HEIGHT will be explained a bit further.
We’re ready. First, we can handle the template file and parse its size:
back = Image.open(TEMPLATE)
TEMPLATE_HEIGHT = back.height
TEMPLATE_WIDTH = back.width
Next, let’s calculate result image size (and create the output image draft):
x = TEMPLATE_WIDTH * (FIELD_SIZE+1)
y = (TEMPLATE_HEIGHT * (FIELD_SIZE+1)) - (FIELD_SIZE*THIRD_HEIGHT)
img = Image.new("RGBA", (x, y))
X is the full grid horizontal size plus one cell which will be the center; here’s no surprise since it consists from a number of full-width template blocks. Y is more interesting: we have exactly the same logic first to count height, but vertically blocks aren’t placed straight one next to one with full height, so we should subtract the overlapped duplicated parts. You can count that we will have exactly FIELD_SIZE number of one repeated overlapping zone, with height of one third of hexagon — we had to define this value at the beginning because we can’t detect it automatically for all the hexagon angle diversity.
One more thing to more convenient calculations: it’s better to know the length of result hexagon side (in template hexagon blocks count). Obviously, to find it we need to take full horizontal length, subtract 1 and divide by 2: we can easily get it from our FIELD_SIZE variable.
SIDE_LENGTH = (FIELD_SIZE//2)Image generation consists of placing template image on the field in rows, one by one. With PIL, it is enough to know upper-left corner position of it. Y coordinate grows with every next row, and x one is counted every row for most left block in it and grows as row extends. Additionally, we need to know each row length (in blocks).
Before the cycle, initialize Y coordinate position and counter that will store current row size for each row:
pos_y = 0
row_length = SIDE_LENGTH
And the image pasting cycle itself:
for row in range(FIELD_SIZE+1):
    pos_x = (img.width//2) - (TEMPLATE_WIDTH*row_length//2) - (TEMPLATE_WIDTH//2)
    for cell in range(row_length+1):
        img.paste(back, (pos_x, pos_y), back)
        pos_x += TEMPLATE_WIDTH
    if row < (FIELD_SIZE+1)//2:
        row_length += 1
    else:
        row_length -= 1
    pos_y += (TEMPLATE_HEIGHT - THIRD_HEIGHT)
Line with X coordinate position calculating might need to be explained: first, we take half of field size, then subtract half of entire row width and half of the template width to point row start exactly to its place. To place the next block in a row we need to simply add the template width. Also, we grow the row length count until we reach the half of all rows, then we shrink it back to initial length in the last row.
Done! We can save the image:
img.save("output.png")Entire code sample:
from PIL import Image


FIELD_SIZE = 14
TEMPLATE = "./hexagon.png"
THIRD_HEIGHT = 24


def create_png():
    back = Image.open(TEMPLATE)
    TEMPLATE_HEIGHT = back.height
    TEMPLATE_WIDTH = back.width

    x = TEMPLATE_WIDTH * (FIELD_SIZE+1)
    y = (TEMPLATE_HEIGHT * (FIELD_SIZE+1)) - (FIELD_SIZE*THIRD_HEIGHT)
    img = Image.new("RGBA", (x, y))

    SIDE_LENGTH = (FIELD_SIZE//2)
    pos_y = 0
    row_length = SIDE_LENGTH
    for row in range(FIELD_SIZE+1):
        pos_x = (img.width//2) - (TEMPLATE_WIDTH*row_length//2) - (TEMPLATE_WIDTH//2)
        for cell in range(row_length+1):
            img.paste(back, (pos_x, pos_y), back)
            pos_x += TEMPLATE_WIDTH
        if row < (FIELD_SIZE+1)//2:
            row_length += 1
        else:
            row_length -= 1
        pos_y += (TEMPLATE_HEIGHT - THIRD_HEIGHT)
    img.save("output.png")


if __name__ == '__main__':
    create_png()
Images used in this sample:


Source code is also available on Bitbucket (cmd-line use-ready, with help and passing settings as arguments).